

Frugalpac terms and conditions for the purchase of goods

7 Tips for Choosing 4x6 Thermal Labels

Choosing a 4x6 Thermal Label seems simple until a roll jams, a barcode fades, or an adhesive lifts from a cold carton. The right choice depends on more than size. Printer compatibility, label material, adhesive strength, print durability, and roll specifications all affect daily performance. A label that looks perfect on a desk may wrinkle on a fast-moving packing line.

This guide explores seven practical checks for selecting labels with fewer surprises. It considers direct thermal and thermal transfer printing, common shipping surfaces, storage conditions, and the details buyers can verify before ordering. Check the core dimensions against your printer’s requirements. Then test a sample on the actual package. A small trial can reveal curling, smudging, or poor adhesion before an entire case arrives.

A named expert quotation cannot be responsibly included without a verifiable source; inventing one would mislead readers. The advice here therefore focuses on observable criteria, such as barcode clarity, feed consistency, and adhesive performance in real use. Those checks matter. They are not glamorous, but they can prevent reprints and packing delays. One limitation deserves attention: no single label works equally well across every printer, surface, and environment. Choose for the job in front of you, and confirm the result under the conditions your team actually faces.
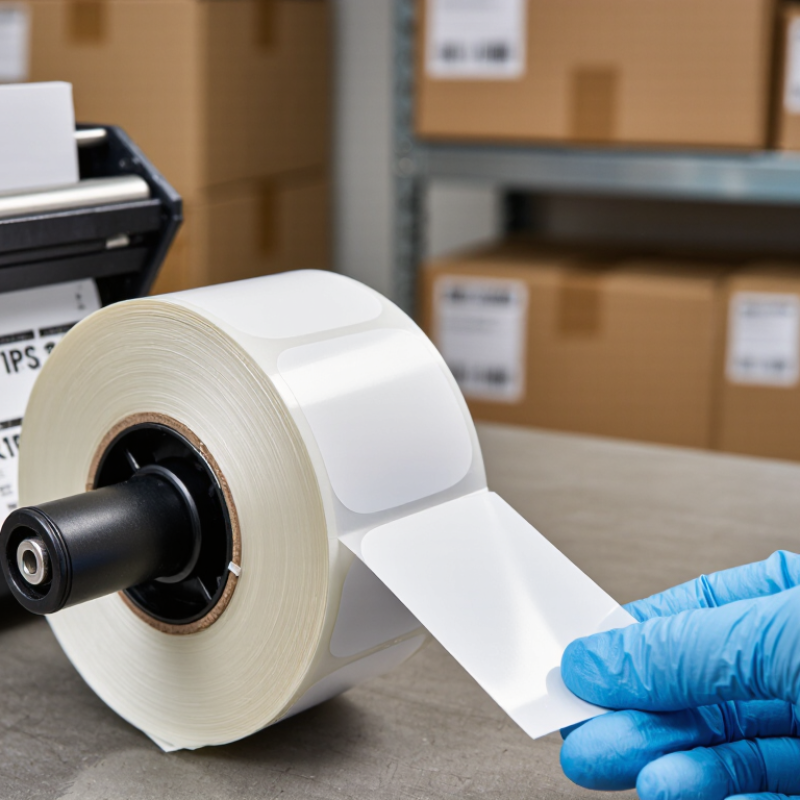
7 Tips for Choosing 4x6 Thermal Labels

Understanding the Standard Size and Uses of 4x6 Thermal Labels

A 4 x 6-inch thermal label measures 101.6 by 152.4 millimeters. It is widely used for parcel shipping because it leaves room for an address, tracking barcode, and routing details. The 2023 Parcel Shipping Index estimated that about 161 billion parcels moved worldwide in 2022. This figure is not a label-size standard. That distinction matters.

Four-by-six inches describes the label stock, not every printer’s usable print area. Margins, sensor gaps, and roll direction can reduce the printable space. Measure the printer path and test one label before a large run. Keep barcodes dark, sharp, and unobstructed. Small checks help. Place labels on a broad, flat surface, away from seams and corners. Make sure clear tape does not blur or cover the barcode.

Direct-thermal labels need no ink ribbon, but heat and sunlight can affect their printed image over time. Store them in a cool, dry place when possible. Thermal-transfer labels use a ribbon and may suit longer storage needs, though they add another supply to manage. The 4 x 6 format is convenient, not magic. Some parcels need a different layout.

7 Tips for Choosing 4x6 Thermal Labels — Understanding the Standard Size and Uses of 4x6 Thermal Labels
Tip What to Check Practical Details Common Uses
1. Confirm the label size Verify the printable label dimensions, not just the outside dimensions of the roll. A 4 × 6 in label measures 101.6 × 152.4 mm. “4 × 6” describes the label face; roll and backing dimensions can differ. Shipping labels, warehouse identification, and package handling information.
2. Match the printer type Check whether the printer uses direct thermal or thermal-transfer printing. Direct thermal labels are heat-sensitive and need no ribbon. Thermal-transfer printing uses a ribbon, so the label face material must be suitable for that process. Direct thermal is often used for shipping labels; thermal transfer can suit applications needing a more durable printed image.
3. Check printer compatibility Confirm supported media width, maximum label length, feed method, and sensor type in the printer specifications. A printer that accepts 4-inch-wide media may still require a particular loading path or calibration setting for 6-inch-long labels. Desktop and industrial label printers used for parcel, inventory, or fulfillment workflows.
4. Choose the right label format Check whether the printer accepts rolls, fanfold stacks, or both. Roll labels may use different core diameters and outside roll diameters. Fanfold labels stack flat. Use the format and dimensions specified for the printer. Rolls for continuous workstations; fanfold stacks where convenient flat storage or feeding is preferred.
5. Verify the feed and sensor marks Match the gap, notch, or black-mark layout to the printer’s media sensor. Labels may be supplied with a gap between labels or a black mark on the backing. The sensor must detect the chosen format so printing starts in the correct position. Accurate positioning of shipping information, barcodes, and tracking codes.
6. Select adhesive for the surface Consider the package material, surface condition, handling, and storage environment. Adhesion can vary on corrugated cardboard, smooth plastic, dusty, rough, or cold surfaces. Test labels on the actual packaging before ordering large quantities. Cartons, mailers, storage bins, and other clean, dry packaging surfaces.
7. Consider exposure and print quality Assess heat, sunlight, moisture, abrasion, and the time the label must remain readable. Direct thermal images can darken with heat or prolonged light exposure and may be affected by abrasion. For demanding conditions, check whether a suitable thermal-transfer label and ribbon combination is more appropriate. Short-term parcel routing and shipping, or longer-lived identification when the media is selected for the environment.

Checking Printer Compatibility and Label Core Requirements

A 4x6 thermal label may fit the printhead width, yet that alone does not guarantee smooth feeding. Check the printer manual for supported media width, maximum roll diameter, and loading direction. Confirm whether the printer uses direct-thermal or thermal-transfer labels; the specified printing method matters more than habit. A roll that is too wide can wrinkle or catch at the guides.

Core size is easy to overlook. The cardboard tube inside the roll must match the printer’s holder or adapter. Measure both. Also check whether the printer expects a particular core diameter, rather than assuming every 4x6 roll uses the same one. A loose core can wobble; a tight fit can make the roll drag. Both may cause uneven feeding or skipped labels.

Before ordering a case, load one roll and print a few test labels. Watch how it turns, and check that the sensor detects each gap or mark. I would not rely only on a product listing’s “fits most printers” claim; the details can be incomplete. Do a test. If the roll feeds cleanly but prints off-center, revisit the media settings and label orientation before changing hardware.

Choosing the Right Adhesive for Your Packaging and Environment

7 Tips for Choosing 4x6 Thermal Labels

Choosing the right adhesive starts with the package surface. Smooth cartons, recycled cardboard, and plastic mailers can hold labels differently. Permanent adhesive is often a practical choice for shipping cartons that face handling and friction. For reusable bins or temporary labels, a removable option may work better. Check the adhesive specifications against your actual packaging, not just a sample sheet. Small differences matter.

Consider the conditions between printing and delivery. Cold storage, damp loading areas, and dusty surfaces can weaken adhesion. If packages sit in a chilly warehouse, test labels at that temperature before ordering a large roll. Press one onto a clean, dry box, then check its edges after a day. Test before scaling. I once assumed a label that stuck indoors would hold just as well on a cold carton; that was an easy assumption to make, and not always a reliable one.

Quick tips: Match adhesive to the surface and expected conditions. Apply labels to clean, dry packaging. Test a small batch, including corners, before committing. If labels peel or leave residue, reconsider the adhesive type and application process.

Comparing Label Materials, Coatings, and Print Durability

Choosing 4x6 thermal labels starts with the job, not the price. Direct thermal stock needs no ribbon, but heat and sunlight can darken its coating. Thermal-transfer stock uses a ribbon and often suits longer storage or rough handling. A glossy topcoat can resist moisture and abrasion; an uncoated face may be more economical for fast-moving parcels. Yet “water-resistant” does not mean waterproof. Test the actual label on your carton, tote, or plastic mailer.

Tip: Compare peel and print wear before ordering. FINAT Technical Handbook FTM 1 and ASTM D3330 describe controlled peel-adhesion testing, helping buyers compare samples rather than rely on vague tack claims. For a simple field check, print identical labels, rub each with a dry cloth, then repeat after exposure to dampness and warm storage. Record fading, edge lift, and barcode readability. A clean result on day one proves little. We learned that the hard way.

Material choice also affects scanner performance. A dark, even barcode matters more than a glossy finish; glare can make scanning inconsistent. Check print contrast and barcode grades using ISO/IEC 15416, which defines barcode print-quality measurement. Keep the test realistic: cold warehouses, dusty hands, and curved boxes can expose weaknesses a desk test misses. There is no universal winner. A coating that protects one shipment may add unnecessary cost to another.

7 Tips for Choosing 4×6 Thermal Labels — Comparing Label Materials, Coatings, and Print Durability

Ratings are illustrative relative scores from 1 (low resistance) to 5 (high resistance), not standardized test results. Actual durability depends on the label formulation, coating, print settings, and— for thermal transfer labels—ribbon choice. Paper labels are generally less suited to moisture and abrasion than synthetic labels.

Evaluating Roll Quantity, Cost, and Supplier Quality

For 4x6 thermal labels, compare usable labels per roll, not just the roll count. A case with fewer rolls may still last longer if each roll holds more labels. Check the core size, outside diameter, and printer limits before ordering; a roll that does not fit can stop packing work mid-shift. Then calculate cost per usable label, including shipping and expected print waste. Cheap rolls are not always cheap.

Supplier quality needs a hands-on check. Request a sample roll and test it on your own printer, ribbon setup, and packaging surface. Scan barcodes after printing, then check whether text stays readable after handling. Ask for consistent roll counts, material specifications, and a clear process for resolving defects. MHI’s 2024 Annual Industry Report says 55% of respondents planned to increase supply-chain technology investment. That is not label-specific, but it shows why dependable data capture matters. One caution: a successful sample does not guarantee every future batch will match. Keep a simple record of lot numbers and print results. Slightly tedious, yes. Useful when quality slips.

Close